Showing posts with label tutorial. Show all posts

Saturday, October 8, 2011

wise owl


this summer, while my best friend was visiting, we took on a little project.  I had seen this adorable owl artwork on pinterest and put it on the top of my must do list.  rachel has done a lot of little painting projects and I have done NONE.  so I hoped that she could maybe help me out when she came to visit.... thankfully she was willing!

we started at the craft store to purchase a canvas and some paint.  I used a wall color I had at home already as the base.  I painted the entire canvas in this muted aqua/teal color.


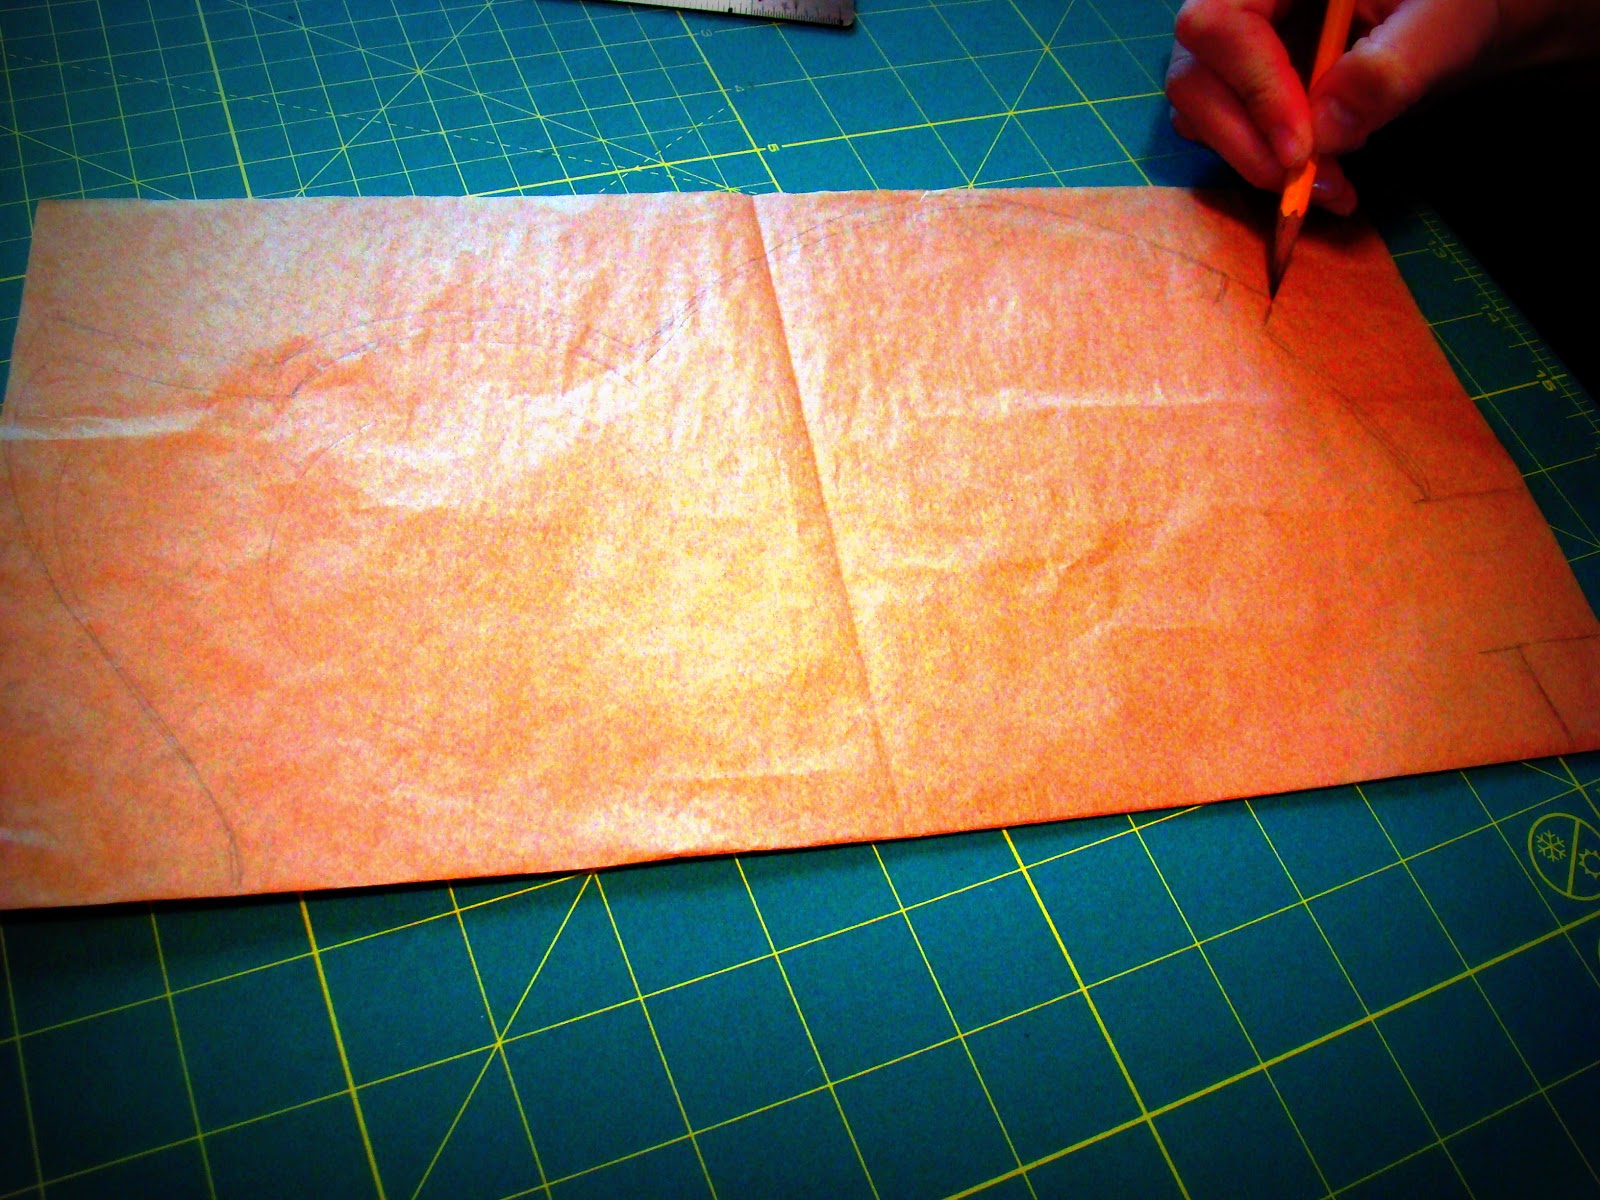
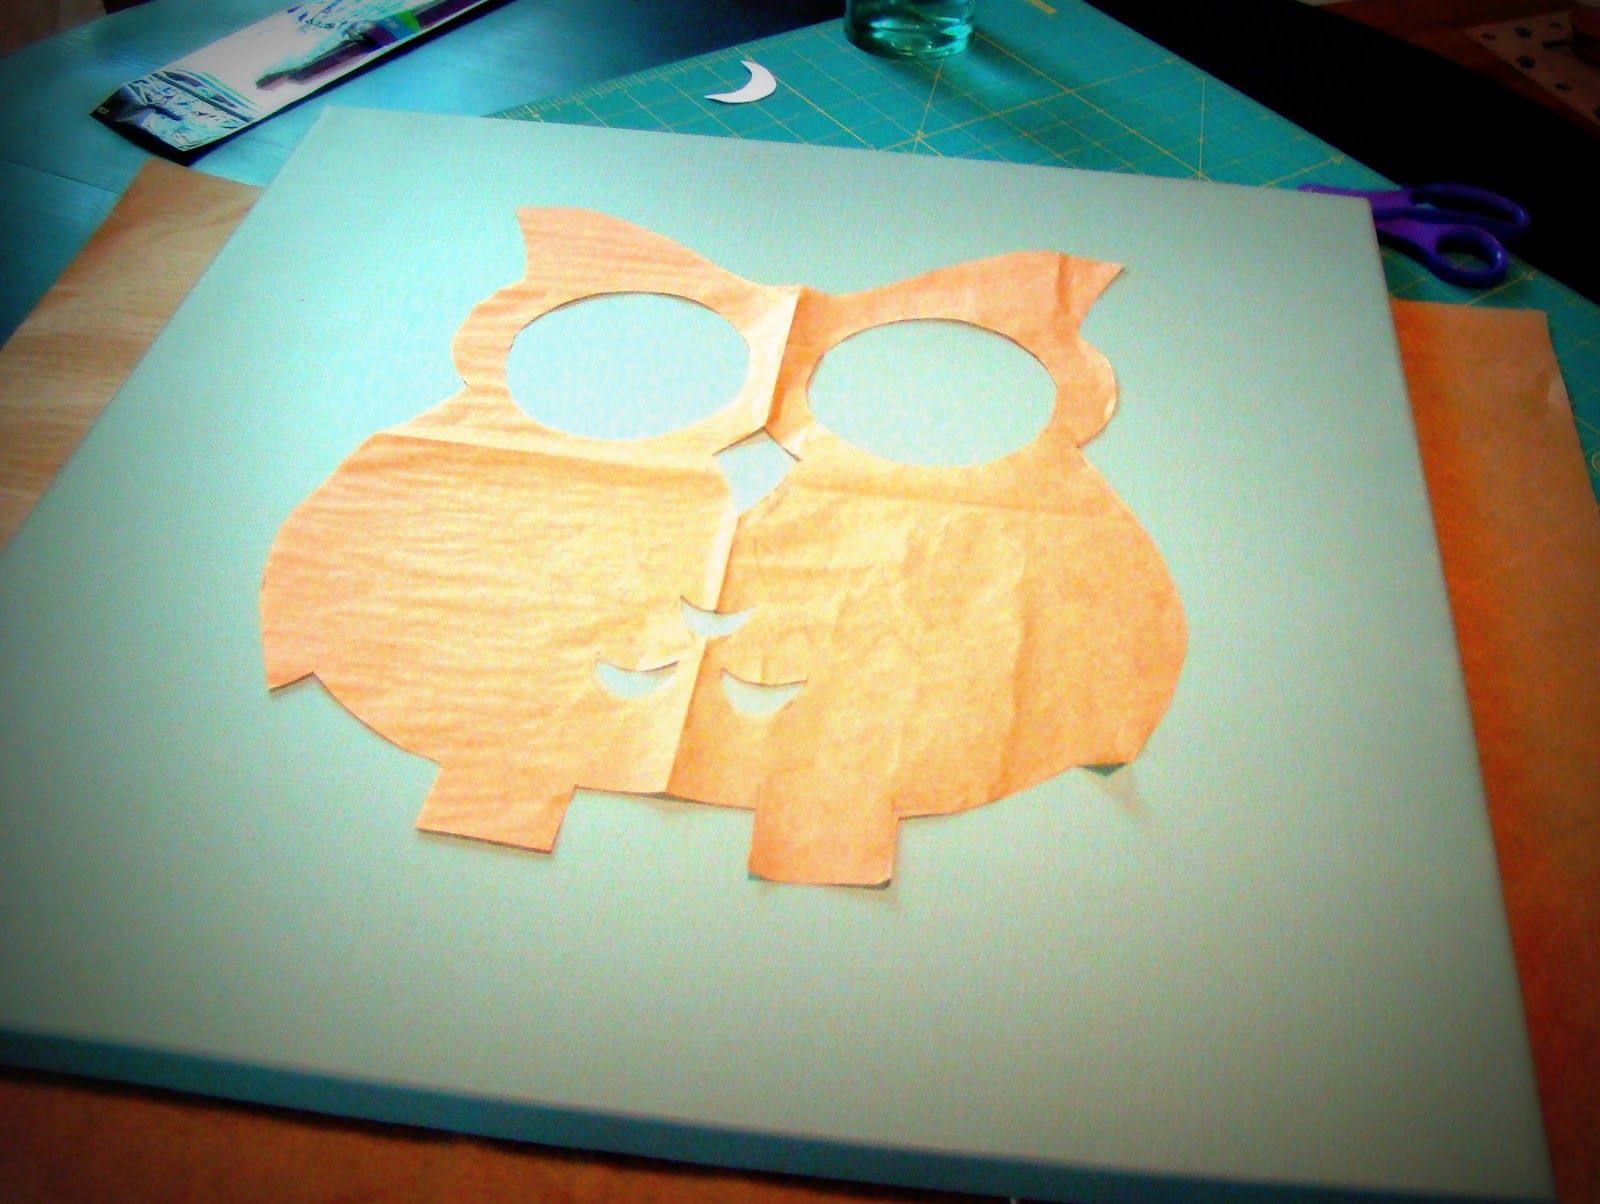
while the base coat was drying we created a template out of tissue paper.  we first measured and cut the tissue paper to the exact size of the canvas.  we then folded it in half and looking at the photos from the original post rachel drew the owl on the paper. we folded the paper in half to be sure to have a symmetrical owl.


I then cut out the template and traced it onto the canvas.


then we painted the owl on to the canvas.  the more paint in your brush the better because it goes on more smoothly.  a good brush and quality paint is key... I always use toll paint type paint and have to go over it again and again.  this time I bought a high quality acrylic paint and it worked much better!


and here is the finished painting hanging in my office at school... next to some of my favorite photos and, of course, mr. potato head!


Saturday, October 1, 2011

an inspired lamp

a few months ago I helped my dad move some furniture out of my great grandparents' house.  in the process there were two lamps that I spotted... they were pretty fabulous, but I didn't know just what to do with them.  after pondering it for a few months, buying a few different fabrics, and googling how to recover a lampshade I finally figured out what to do.  I did a search at my favorite store, anthropologie, for some lamp shade inspiration.  my lampshade went from this... to this!


first, I had the original lamp.  I knew I was going to repaint the base, simple, right?  well, then after looking at paint I decided, I'm going to paint the shade too!  so to the hardware store I went and found two paint colors that would work.  

then, I scoured my fabric pile, and the bags of clothes I had ready to donate to the thrift store.  I love using fabric from clothing for projects because it has so much texture and more character than craft store fabrics for a fraction of the cost (especially if I'm just planning on donating it anyway!).  I put together 3 patterns--- 1 wide fabric, 1 in between width fabric, and 1 narrow fabric.  I measured the diameter of the shade, divided it by the number of strips I wanted to have (I wanted 12) and then cut my widest strip to that width.  I think mine ended up being 3.5 inches, 2 inches, and 1 inch wide.  I did four of each pattern and repeated them around the shade-- I first sewed the three fabric strips together (optional) to make one big strip-- then hot glued them to the top and bottom of the shade.


after all the strips were on the shade, I used hemp jewelry twine to cinch the fabric strips at different heights around the shade.  there was somewhat of a pattern to this, but no measuring.


I then hot glued grosgrain ribbon along the top and bottom of the shade to hide my unfinished edges of fabric.


from my button collection I pulled 12 mismatched buttons that I liked and hot glued one on top of each knot of twine on the fabric strips.


I put the shade back on to the lamp base, and that's it. this was a pretty huge lamp.  the hardest part was deciding what to do.  once I had decided it wasn't as difficult as I thought it was-- it ended up pretty straight forward actually.  I still have one more lamp in it's original condition... should I try a second?


I'm linking up to Tatertots and Jello


Tuesday, May 17, 2011

hemming jeans while keeping the original hem

do you ever buy jeans that need hemmed, but don't want to lose the original hem?  you know, the factory finish... so that they don't look like they are "home hemmmed"?  well, I have tried a few different ways.  here is one way, that yes, is fabulous --link to hemming tutorial--, but what happens when you have 3-4 inches of that "left over hang" inside of your pant leg??  if I cut it off I have fray to worry about.  and what if I want to roll up my pants? I can't do it if I hem them this way.  so, when I was asked to hem 3 pair of jeans in a new way I was a bit hesitant, but excited to learn something new.

here's how I did it:

measure the length that you need the inseam to be.  
using a straight edge cut the jeans AT THIS EXACT LENGTH.


cut off the excess from the original hem so that you have just a half inch of the "pant leg" extra and the hem.


using a seam ripper remove all the old stitching

open the seam and fold and iron the raw edge in to the hem.  
this is quite easy because the original stitching has created a fold.

you now have a "finished" unfinished hem.


sandwich the original hem back on to the now shortened jeans lining up the side seams, pin in place.


sew the hem back on being careful where the fabric is extra thick to ensure not breaking the needle.  find a matching thread color, and if possible thickness.  my thread was thinner than the original so I sewed over the same area twice to make the stitching more prominent.  I also used a basting, or long, stitch because that is how the original stitching was.


tada! the finished product, good as new!


linking up to tatertots & jello

Sunday, January 2, 2011

homemade gifts :: personalized pilsners

the husband drew my older brother's name for our homemade gift exchange.  the biggest challenge for the hubs and me is to make something that the gift receiver will not only enjoy, but use.  so for my brother this can be really challenging.  after multiple ideas we came up with something that the hubs thought the brother would really enjoy.  personalized pilsner glasses.

the project started with a few simple supplies: 
a set of pilsner glasses from IKEA, etching cream, and left over shelf liner.


then we needed an image to make into a stencil and etch on to the glass.  so, the "H" from the family business and his last name was a perfect image to use.  husband printed multiple sizes of the "H" on to cardstock, he decided on the perfect size for the size of the glass.


the image was then traced on to some shelf liner that I had left over to make an adhesive stencil, the stencil was then cut out with a razor blade.  an individual stencil was needed for each glass in order to be sure that it stuck strongly enough to leave a crisp edge to the image.  this was the most time consuming and difficult step of the process, both the cutting and placing of the image took patience and attention to detail. 

the etching cream was used according to package directions --brushed on in one direction and let to sit around 10 minutes before rinsing off. rinsing it off.

the final product was great... a nice sharp "H"... we were happy with how appropriate they were for a guy, not at all crafty and girly.  my brother loved them too!

the gift was accompanied much like the wine stopper gift.  we added my brother's favorite, a 6 pack of bud light and a bottle of clamato to make his own "red beer". 

Thursday, July 8, 2010

ruffled tank

I love trips.  adore them really.  I just love being on vacation.  however, I've discovered something about myself and trips: I always want new clothes to pack for vacations, always, without fail.  

the husband and I went on a little mini vacation last week.  we met up with the california family in laughlin, nevada.  the week was filled with days in the sun, good food, and lots of entertainment.  preparing for the trip I knew I wanted something new to pack.  just something simple... like a new pair of shoes, or a new top, or a new skirt... anything really.  just so I could pack something that was different from my every day.  so I was perusing websites when I came across this ADORABLE tank: 


this spurred a thought... I could make something like that!  just a week before I had bought some jersey knit for my colorblock dress... I still had a quarter yard left.  and I have two tank tops I never wear because, well honestly, they are just too plain.  ooh!  I was inspired!!

inspired is the correct term because my tank is somewhat different, but I do love how it turned out.
step one: choose tank to add embellishment to

I chose the purple tank because I liked how the accent fabric went with it.

step two:  make ruffle for front of tank.  I made a ruffle and then pinned it on to the tank where I thought was appropriate.  this is fairly simple.  it took me a few tries to get the ruffle the correct amount of "ruffled" and pinned just right, but once I did it was easy peasy!


step 3: sew down ruffle.  I top stitched the ruffle down.  where the ruffle folds over I left that part unsewn... it was really only about an inch of fabric anyways and the ruffle continues so nicely when it's not being pulled at. remove basting stitches from ruffle.  {I also added a "trim" piece to the collar to cover my raw edge of the ruffle.  I honestly liked the look of the raw ruffle, but I was not careful with my sewing so mine wasn't so pretty}

step 4: add flowers.  I don't have pictures of the process of this, or a tutorial for it.  I made rolled rosettes... there are tons of tutorials for them online... I could have done layered flowers, or made a rosette in a multitude of ways, but I've really been liking the look of rolled rosettes lately, so I just looked up a tutorial and away I went.


two flowers on the shoulder


and one to finish off the ruffle on the bottom

step 5: wear! {I failed at getting pictures of me wearing my new top... I tried to take some today before posting, but they were blurry.  so next time I wear it I will take some pics}

... disregard the wrinkles please ...

the tank turned out quite nice.  I really like the color of purple and the way that the steel/blue color becomes more violet against the purple.  it's a great comfy tank that has a little extra added oomph.  a perfect, no cost addition to my summer wardrobe.