Showing posts with label projects. Show all posts

Saturday, October 8, 2011

wise owl


this summer, while my best friend was visiting, we took on a little project.  I had seen this adorable owl artwork on pinterest and put it on the top of my must do list.  rachel has done a lot of little painting projects and I have done NONE.  so I hoped that she could maybe help me out when she came to visit.... thankfully she was willing!

we started at the craft store to purchase a canvas and some paint.  I used a wall color I had at home already as the base.  I painted the entire canvas in this muted aqua/teal color.


while the base coat was drying we created a template out of tissue paper.  we first measured and cut the tissue paper to the exact size of the canvas.  we then folded it in half and looking at the photos from the original post rachel drew the owl on the paper. we folded the paper in half to be sure to have a symmetrical owl.


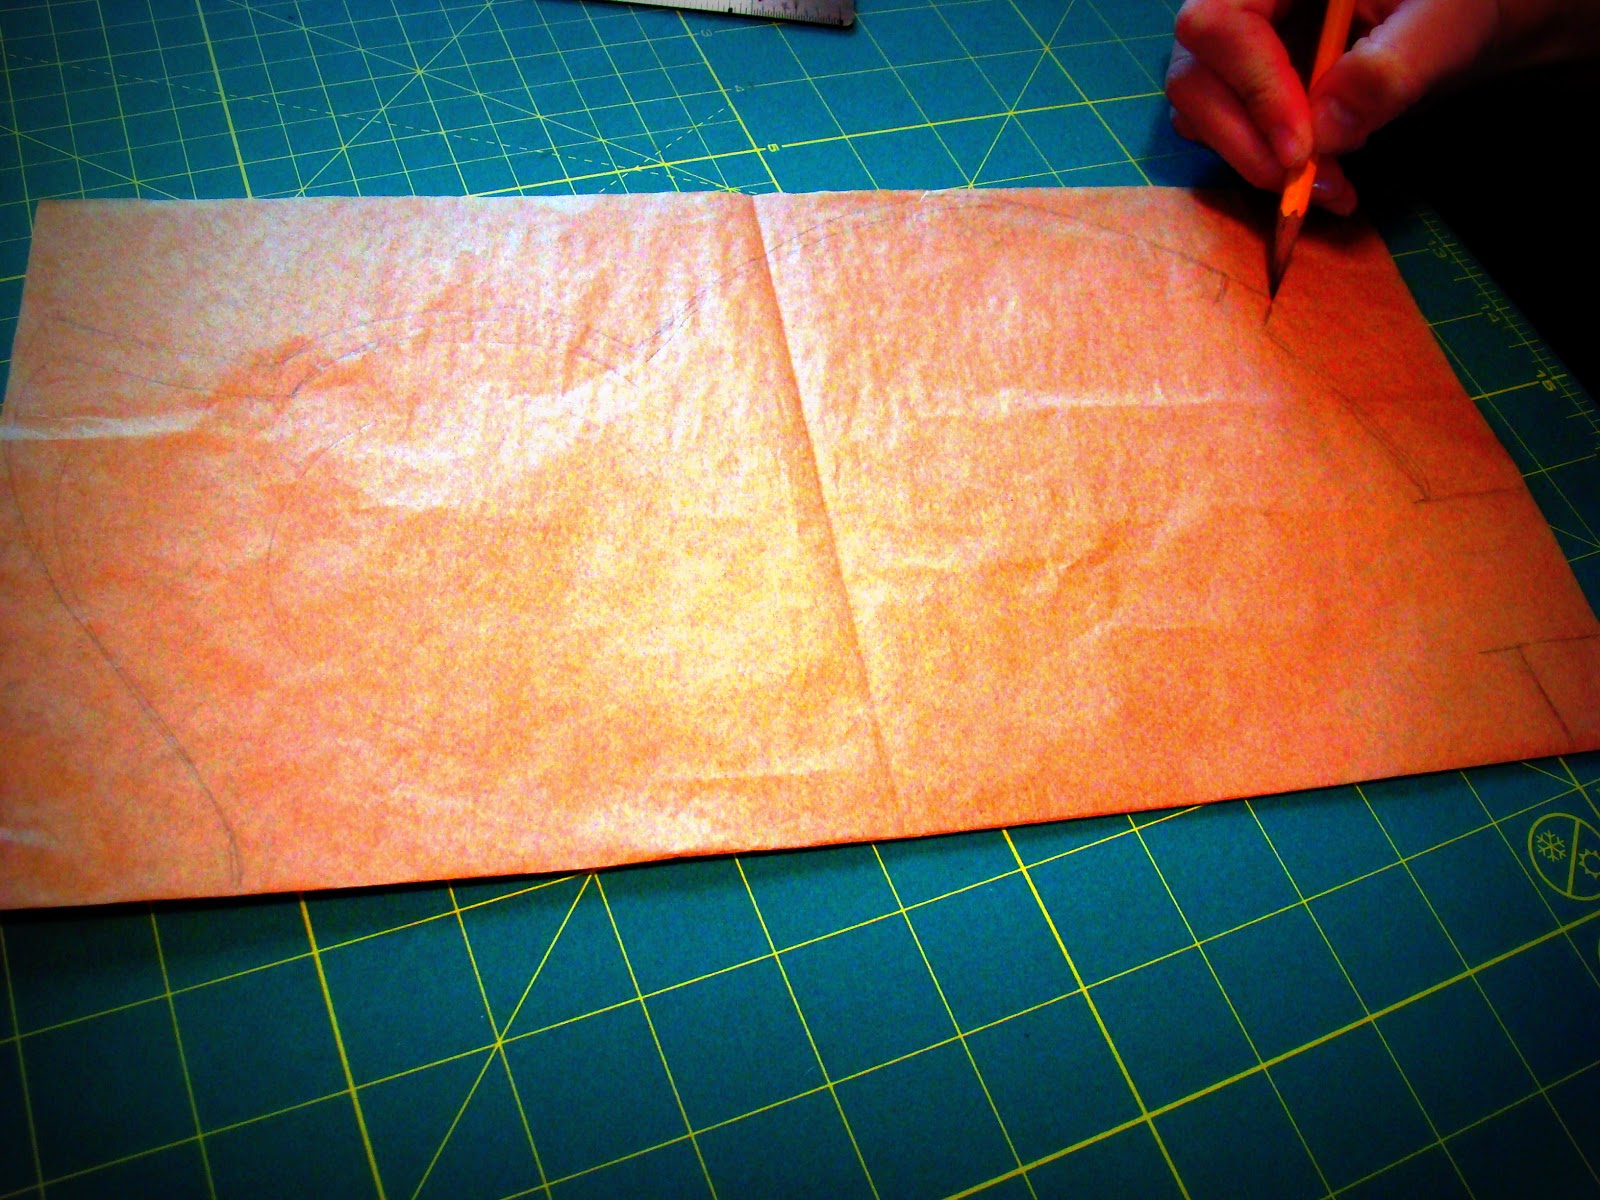
I then cut out the template and traced it onto the canvas.


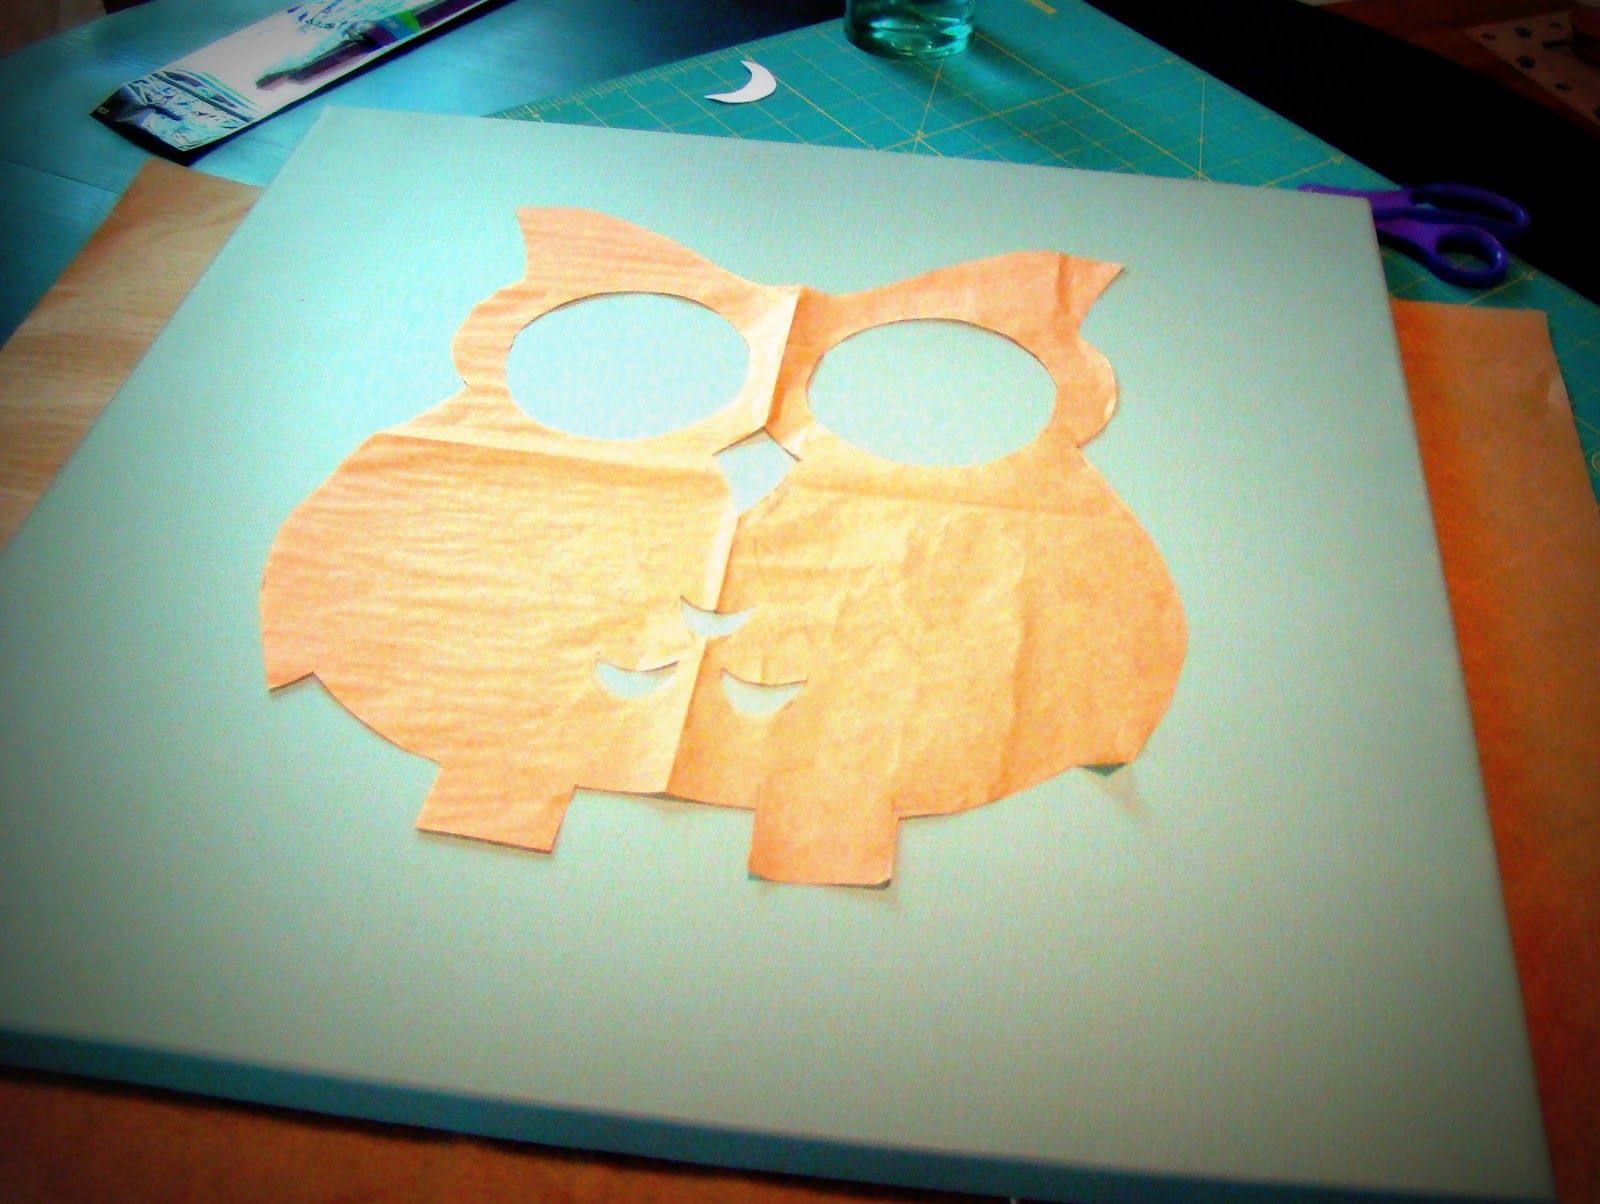
then we painted the owl on to the canvas.  the more paint in your brush the better because it goes on more smoothly.  a good brush and quality paint is key... I always use toll paint type paint and have to go over it again and again.  this time I bought a high quality acrylic paint and it worked much better!


and here is the finished painting hanging in my office at school... next to some of my favorite photos and, of course, mr. potato head!


Saturday, October 1, 2011

an inspired lamp

a few months ago I helped my dad move some furniture out of my great grandparents' house.  in the process there were two lamps that I spotted... they were pretty fabulous, but I didn't know just what to do with them.  after pondering it for a few months, buying a few different fabrics, and googling how to recover a lampshade I finally figured out what to do.  I did a search at my favorite store, anthropologie, for some lamp shade inspiration.  my lampshade went from this... to this!


first, I had the original lamp.  I knew I was going to repaint the base, simple, right?  well, then after looking at paint I decided, I'm going to paint the shade too!  so to the hardware store I went and found two paint colors that would work.  

then, I scoured my fabric pile, and the bags of clothes I had ready to donate to the thrift store.  I love using fabric from clothing for projects because it has so much texture and more character than craft store fabrics for a fraction of the cost (especially if I'm just planning on donating it anyway!).  I put together 3 patterns--- 1 wide fabric, 1 in between width fabric, and 1 narrow fabric.  I measured the diameter of the shade, divided it by the number of strips I wanted to have (I wanted 12) and then cut my widest strip to that width.  I think mine ended up being 3.5 inches, 2 inches, and 1 inch wide.  I did four of each pattern and repeated them around the shade-- I first sewed the three fabric strips together (optional) to make one big strip-- then hot glued them to the top and bottom of the shade.


after all the strips were on the shade, I used hemp jewelry twine to cinch the fabric strips at different heights around the shade.  there was somewhat of a pattern to this, but no measuring.


I then hot glued grosgrain ribbon along the top and bottom of the shade to hide my unfinished edges of fabric.


from my button collection I pulled 12 mismatched buttons that I liked and hot glued one on top of each knot of twine on the fabric strips.


I put the shade back on to the lamp base, and that's it. this was a pretty huge lamp.  the hardest part was deciding what to do.  once I had decided it wasn't as difficult as I thought it was-- it ended up pretty straight forward actually.  I still have one more lamp in it's original condition... should I try a second?


I'm linking up to Tatertots and Jello


Friday, June 17, 2011

happy belated

sometimes the calendar moves more quickly than my schedule can handle.  may was a perfect example of this.  now, quite a few weeks after mother's day I have finally finished making the gift I had in mind for my mother-in-law.  hopefully this fun apron will make its way to summer barbeques soon.


  linking up here

Saturday, April 30, 2011

updating outdoor furniture

about a month ago, I had the opportunity to get some outdoor furniture at a killer price... free!  when the price tag shows $0 I cannot complain.  I loved the shape of the furniture and it's the perfect size.  the only problem was that the set was missing two chairs... I needed two more to have a set.  so the hubs and I hit up all of the places we could think to find two more chairs, and of course, to no surprise to us at all, found chairs that were aesthetically pleasing and super comfortable at cost plus.  


we could have kept them as they were, but that wouldn't really be like me.  so I set off to the hardware store to find some yellow or orange paint to liven up the furniture.  of course, there was nothing wrong with the set before I painted it, it was in perfect condition, but I just had to add some color (our house is gray, so how boring would the gray furniture be?)

before paint


the start of the orange paint... waaaaay too much... too close to red (bleh)... a change must be made!


chartreuse!  the perfect solution!


I love the way it turned out.  the bright green is perfect, an organic color yet bright and lively!  also, the scroll detail sticks out more and they look more "whimsical" or "vintage-esque" I think.  I did leave the chairs we bought their original color... why?  why not?

and I couldn't leave out my favorite back yard detail... an iron tree with colored glass tea light holders.  I just can't wait to plant up my pots, barbeque some great food, and hang out on the patio all evening.


Wednesday, March 30, 2011

take 1 | guest room

after much searching for inspiration for our guest room we finished the little project.  this was honestly one of the easiest, inexpensive art project I've done.  but first, let me show you the room.

one of the biggest purchases we've made as a couple yet was this bed.  we needed a spot for our guests to stay.  and I love the way that the bedding works in the room.  I'm thinking of what to do for the headboard, but that can wait a while... if you have any ideas please shoot them my way ;)


a little seating area for guests to read a book, make a phone call, or just simply put on their shoes.  plus, I love showing off the hub's mates he picked up while living in argentina.


and here is the art project.  honestly, so simple (tutorial here).  well, picking out the fabric was a little bit of a chore, I have a hard time getting what I want to work together when I have so many different kinds of fabric I love.


this room is still a work in progress as we have a few more things to hang on the walls, a desk to save up for, and other little things... but, it is ready for guests!  so come visit, stay for a while and enjoy boise with us!

Sunday, January 2, 2011

homemade gifts :: personalized pilsners

the husband drew my older brother's name for our homemade gift exchange.  the biggest challenge for the hubs and me is to make something that the gift receiver will not only enjoy, but use.  so for my brother this can be really challenging.  after multiple ideas we came up with something that the hubs thought the brother would really enjoy.  personalized pilsner glasses.

the project started with a few simple supplies: 
a set of pilsner glasses from IKEA, etching cream, and left over shelf liner.


then we needed an image to make into a stencil and etch on to the glass.  so, the "H" from the family business and his last name was a perfect image to use.  husband printed multiple sizes of the "H" on to cardstock, he decided on the perfect size for the size of the glass.


the image was then traced on to some shelf liner that I had left over to make an adhesive stencil, the stencil was then cut out with a razor blade.  an individual stencil was needed for each glass in order to be sure that it stuck strongly enough to leave a crisp edge to the image.  this was the most time consuming and difficult step of the process, both the cutting and placing of the image took patience and attention to detail. 

the etching cream was used according to package directions --brushed on in one direction and let to sit around 10 minutes before rinsing off. rinsing it off.

the final product was great... a nice sharp "H"... we were happy with how appropriate they were for a guy, not at all crafty and girly.  my brother loved them too!

the gift was accompanied much like the wine stopper gift.  we added my brother's favorite, a 6 pack of bud light and a bottle of clamato to make his own "red beer". 

Friday, December 31, 2010

homemade gifts :: wine stoppers

each year my family draws names between my siblings, parents, aunts and uncles, and cousins.  we draw names and then give home made gifts.  this is the third year we've done it.  the gifts are getting harder to make because we have made them for a few years now and we try not to copy each other.  this year's gifts, in my opinion, were the best yet.  I drew my cousin, Stacia's name, and the husband drew my brother's (his gift to follow).

I made Stacia wine stoppers.
here are the supplies: 3 decorative drawer pulls from hobby lobby, corks, gorilla glue epoxy, a decorative box, and paper "fluff" to fill the decorative box.

first I took the drawer pulls and corks and decided a good height for the corks to be.  I could have left the corks exactly how I purchased them, but I thought they came too far out of the bottle.  I measured and cut three corks down to the size I desired using a hack saw.  husband then drilled a hole in to the middle of the cork for the drawer pull to go through.


he also made the hole slightly larger on the bottom so we could counter set the nut into it.

then all pieces were put together.  (for two of the stoppers I had to buy a decorative "washer" from home depot to finish off the cork so that it looked right against the glass pull)  I put the epoxy on to the top of the cork, and inside the hole of the cork, and screwed the cork onto the pull.


after the epoxy dried the husband cut off the remainder of the pull, the bolt part of it, with a hack saw.  he then used a grinder to make it smooth.  the final step was to add some epoxy to the base where the nut and bolt were showing to make sure it was completely smooth and secure.


the finished product:


she loved them!  and so did I.  I want to make a set for myself now too!  I also added a bottle of champagne to the gift (her favorite), but these given with a bottle of wine would be a perfect hostess gift, housewarming gift, or a gift for any other occasion -- they can be completely customized for the person in mind and they are more personal than any other stoppers I've seen in stores.

Monday, November 22, 2010

and the projects have begun!

we are officially homeowners!  all papers are signed and we have the keys in our hands and are so excited to move in!  first, we are traveling to california to celebrate Thanksgiving with the family, then we will come home and start the moving process.  

however, the projects have already begun.  we have sold some furniture (remember my chairs?) to make room for some new furniture pieces, we have started looking for items to add to what we already have so that we can have a grown up house and not just a pieced together house from our mismatched belongings.  but the first project we have nearly conquered was a big one.  we scraped and painted the entire house!
you can't tell from pictures, but before the paint was peeling, a lot.  so the husband scraped and scraped with a painter friend and prepared the house.

 then we had the painter come and spray the entire house a new, fresh color.  we were a little nervous at this point, because it was a little darker than we thought it would be.  but we held on tight and continued on.  we hired a painter for the base paint of the house, but thought that we could do the trim ourselves.  WORD TO THE WISE: don't paint the trim yourself, it's tedious, takes forever, and is harder than you'd think!

because the weather is quickly becoming wet and COLD we had to do as much as we could in one day.  we were able to get almost all of it done.  if we get another warm day the back windows will all be trimmed out, if not the project will continue through the spring.


 we love how it turned out!  the yellow door against the gray and ivory.  we love how much the ivory brightened it up.  and though you can't tell in the pictures, a fresh new coat of paint makes a world of difference!
now to paint a few rooms inside too...